
- Nov 15, 2025 7:23:51 PM
- Posted by Bryan Holmes
- Topics:
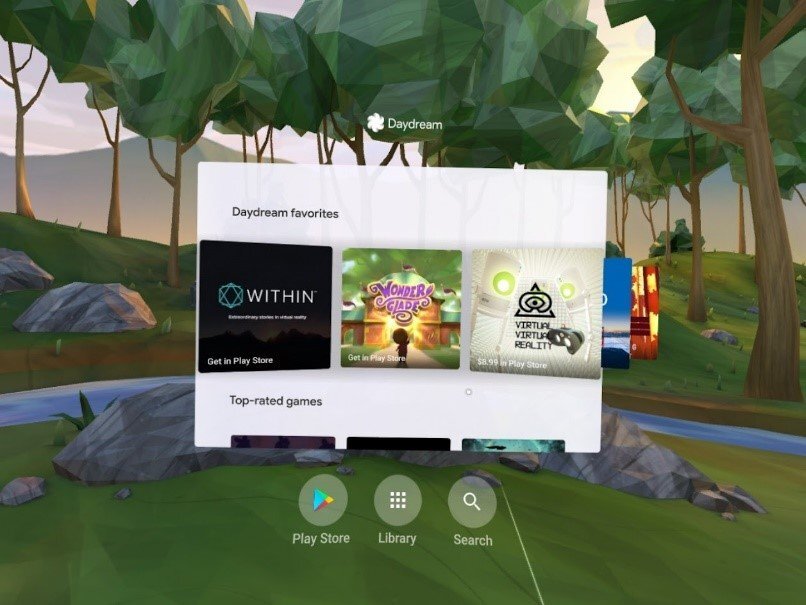
Expeditions 2.0 troubleshooting
.png?width=824&height=333&name=Expeditions%202.0%20Logo%20(4).png) Student devices lose the connection. Nothing will connect. The app freezes when I press "play". We've seen it all and found the solution!
Student devices lose the connection. Nothing will connect. The app freezes when I press "play". We've seen it all and found the solution!
If you are experiencing a problem with the Expeditions 2.0 program, the very first thing to check is that your devices are running the most up to date app versions. You can find the version number by holding the icon for two seconds then selecting "App Data". The most current version of the teacher app is 2.46 and the most current version of the student app is 2.41. If you need to update the app, Contact Support.
- May 7, 2025 3:44:59 PM
- Posted by Bryan Holmes
- Topics: Expeditions, Expeditions 2.0
NAO robot apps download guide with STEMLAB
How to download apps for your NAO robot using STEMLAB?
- May 7, 2025 3:44:14 PM
- Posted by Charles Nimrad
- Topics: NAO, STEMLAB, Apps
What if a robot breaks?
Never fear! Each box comes with a warranty for one year. For more information on what each specific warranty contains see this article on our warranties
- May 7, 2025 3:43:13 PM
- Posted by Brendan Barnard
- Topics: Troubleshooting & Warranties, About the BOX
Expeditions 2.0 App Keeps Stopping
You dig out your VR kit, run VR Expeditions 2.0, and it says there is an update. So you update only to find that your student devices are giving you an error "The app keeps stopping".
Breathe - there IS a solution!
- Jan 17, 2024 10:16:27 AM
- Posted by Bryan Holmes
- Topics: Expeditions, Expeditions 2.0
Help! I bought the standard box and now I want to upgrade to the deluxe!
It’s your lucky day; you can upgrade at any time. Please note that the extended warranty and 1 year subscription start from the original purchase date, not the upgrade purchase date. See more about warranties
- Jan 24, 2023 5:43:22 PM
- Posted by Brendan Barnard
- Topics: Troubleshooting & Warranties, Ordering, Processing, & Shipping, About the BOX
NAO's basic channel bug is fixed here's what to do
For the past few weeks if you had basic channel installed on your NAO you probably experienced a frustrating problem, the NAO wouldn't hear or understand your commands. It didn't matter what you said among the sentences that NAO is supposed to understand it wouldn't react. It was stuck in listening mode like that
- Jan 24, 2023 5:41:47 PM
- Posted by Natanel Dukan
- Topics:
My ARMBot won't connect with my tablet
How to connect the ARMBot to your tablet:
#1 Make sure ARMBot is plugged in securely. Unlike the other robots in the RobotsLAB BOX, ARMBot needs to be connected to an outlet in order to work. The ARMBot uses the largest charger cable and power supply inside the Accessories Kit.
- Jan 24, 2023 5:39:41 PM
- Posted by Brendan Barnard
- Topics: Troubleshooting & Warranties, About the BOX
Can I purchase a warranty? What’s included?
Each RobotsLAB-BOX comes with a 1 year warranty. The Deluxe BOX covers the following: 3 free hardware repairs (including robots, tablet, or accessories) and free shipping.
- Jan 24, 2023 5:38:57 PM
- Posted by Brendan Barnard
- Topics: Troubleshooting & Warranties, About the BOX
Autonomous Cars Firmware Update *Old Version not in use
Has your RobotLAB Autonomous Car been connecting to Bluetooth, and seemingly connecting to Orchestra, but not responding to any of the code you write?
You don’t have a lemon, your car just needs a Firmware update! Follow these simple steps to get your car running again.
- Jan 24, 2023 5:38:07 PM
- Posted by Samantha Baker
- Topics: Autonomous Cars
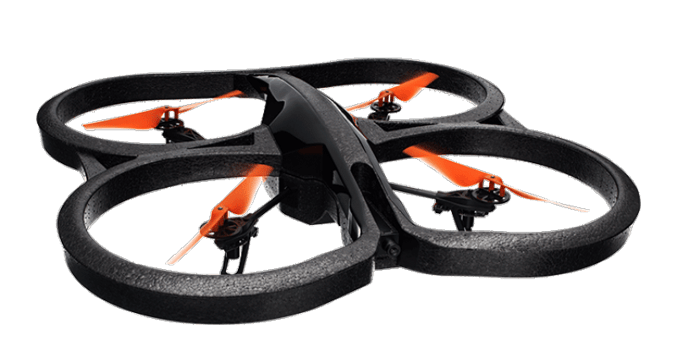
My AR.Drone batteries won't charge/aren't working right. What do I do?
Your AR.Drone uses LiPo batteries. LiPo stands for Lithium Polymer – they’re great because of their light weight and huge power storage abilities, but there are some downsides we’re finding out about. These batteries are very fragile, and there are a few specific procedures for charging and using the batteries that you should know before use.
- Jan 24, 2023 5:30:59 PM
- Posted by Brendan Barnard
- Topics: About the Robots, Troubleshooting & Warranties
I Keep Experiencing Errors on Pepper Even After Restart
If you keep getting error even after a restart, this usually indicates that it is time for a firmware reset.1. Turn OFF the robot.
2. Press and hold the power button for 6 seconds
until its shoulders start blinking blue.
3. Wait for 10 minutes until the reset process is complete.
- Jan 24, 2023 5:25:38 PM
- Posted by Anna Sandler
- Topics: Troubleshooting & Warranties, Pepper
What is included in the RobotsLAB-BOX?
The Standard RobotsLAB-BOX includes these goodies:
50 Lessons and Quizzes covering standards in Algebra, Physics, Geometry, Trigonometry and Pre-Calculus, 4 Robots, 1 10.1" Tablet, 12 Accessories, a transport case and 1 Year Warranty.
Want more? Check out the deluxe package
- Jan 24, 2023 5:15:04 PM
- Posted by Brendan Barnard
- Topics: Sphero, Drones, Robotic Arm, quadcopter
My school uses a program that connects to projectors/smartboards over Wi-Fi (miracast, chromecast, etc.). Can I use this with the BOX?
Wireless data streaming programs like Miracast and Chromecast are becoming popular ways to reduce the number of wires, plugs, and cables in classrooms. The short answer, though, is that while you can use these technologies to connect your BOX and tablet with a projector, we recommend that you don't. Your tablet for the RobotsLAB BOX uses its Wi-Fi connection to control the AR.Drone included in your kit. If the tablet is connected to a projector over Wi-Fi, then it will not be able to talk to the AR.Drone, which means you will be unable to run the lesson!
- Jan 24, 2023 5:14:01 PM
- Posted by Brendan Barnard
- Topics: About the Tablet, Troubleshooting & Warranties, About the BOX
How long does it take to receive my RobotsLAB-BOX?
It’s so exciting buying state-of-the-art teaching technology! Lucky for you the average order-to-door delivery time for a RobotsLAB-BOX is less than 14 business days so you won’t have to be on the edge of your seat for long.
- Jan 24, 2023 5:12:52 PM
- Posted by Brendan Barnard
- Topics: Ordering, Processing, & Shipping, About the BOX
My tablet is broken. What do I do?
First, let's figure out what the problem might be. Is the Tablet physically damaged (broken case, shattered screen, broken button)? Or is it just not working properly?
Is your tablet just behaving oddly? Not turning on, crashing, making noise but nothing shows up on the screen? Having trouble connecting to your robots? The two best fix-it paths: Charge it, and/or Update it!
- Jan 24, 2023 5:12:06 PM
- Posted by Brendan Barnard
- Topics: Troubleshooting & Warranties, About the BOX
How do I charge my ARDrone?
Charging your ARDrone is really easy, but it does take around an hour and a half to charge from a completely dead battery, so leave yourself some time before a planned lesson to check your robot and recharge it if necessary. In order to charge ARDrone, simply open up your Accessory Kit inside the RobotsLAB BOX and pull out the ARDrone charger.
- Jan 24, 2023 5:08:35 PM
- Posted by Brendan Barnard
- Topics: About the Robots, Troubleshooting & Warranties, Drones, quadcopter
I’m not very good with computers, will it be hard to operate the tablet or the lessons?
Absolutely not. The tablet comes fully charged and preloaded with everything you will need. If you still run into problems we are here for you, just reach out and we’ll be happy to help troubleshoot.

- Jan 24, 2023 4:44:12 PM
- Posted by Brendan Barnard
- Topics: About the Tablet, Teaching with the RobotsLAB BOX, About the BOX
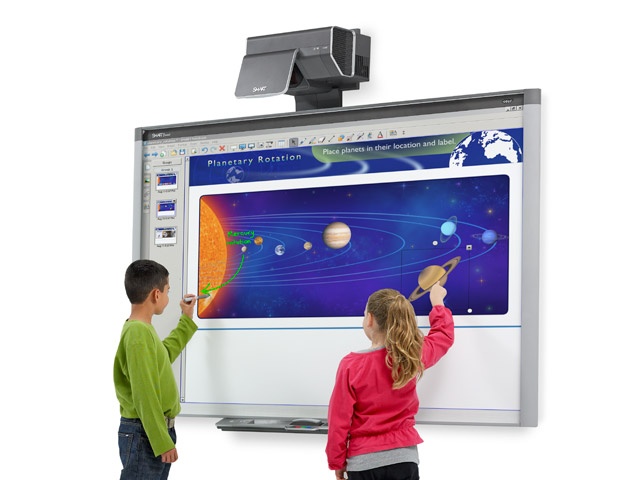
How do I use my Smart Board with the tablet and lessons?
Simply plug the included HDMI cable into the SmartBoard input and use the Smart Board as your projector. You will need to use the tablet to run the lesson and the robots, though we are always working on ways to improve the lessons -- like taking advantage of the additional Smart Board functionality!
- Jan 24, 2023 4:39:26 PM
- Posted by Brendan Barnard
- Topics: Troubleshooting & Warranties
My AR.Drone keeps losing the WiFi connection
Is your drone acquiring and then dropping your WiFi signal, over and over again? We've only seen this happen a few times, but it's a frustrating problem so we wanted to share our fixes. This problem seems to crop up only in a specific situation: you're using the AR.Drone in a room with a metal subfloor, and/or you're using the AR.Drone somewhere with a bunch of competing WiFi networks. We tend to see this happen at convention centers, and the good news is that there's nothing wrong with your AR.Drone or BOX -- it's just the space you're using it in has some signal pollution that makes it hard for the Drone to function at its best. Simply move the Drone to a new location and try again. The problem should disappear!
- Jan 24, 2023 4:36:33 PM
- Posted by Brendan Barnard
- Topics: Troubleshooting & Warranties, Drones, quadcopter
How do I update my tablet?
We try to release software updates for your RobotsLAB BOX tablet on a regular basis. If you're experiencing any difficulties with your BOX, a software update is often the first thing we recommend to fix things. It's also a great idea just to check in periodically to see if there's a new version, and we'll always send out letters and emails to let you know when we release an update.
- Jan 24, 2023 4:34:02 PM
- Posted by Brendan Barnard
- Topics: Add ons, About the Tablet, Troubleshooting & Warranties
How many robots are included in the standard v.s. deluxe BOX
Each box contains the same four robots; the deluxe version features more lessons and a better warranty.
- Jan 24, 2023 4:31:30 PM
Can I purchase additional lessons/robots?
Additional lessons can be purchased on a yearly subscription. Additional robots are not available at this time.
- Jan 24, 2023 4:30:19 PM
- Posted by Brendan Barnard
- Topics: Add ons, About the BOX
Once I have the RobotsLAB-BOX what will I need to do before teaching with it?
Open the box and get acquainted with your new robotic teaching assistants. The tablet and robots are charged and fully configured. We've assembled a Quick Start Guide with a sample lesson to get you going, and we suggest you look over the instructions, review the videos for a few lessons, and do a lesson runthrough or two before demonstrating in front of a class. If you’re more a ‘fly-by-the-seat-of-your-pants’ kind of teacher, then that’s completely up to you, but it’s at your own risk and possible humiliation.
- Jan 24, 2023 4:28:24 PM
- Posted by Brendan Barnard
- Topics: Teaching with the RobotsLAB BOX, About the BOX
How are the robots powered?
The robots are powered through batteries and chargers. The robots and tablet also come fully charged and ready to rock ‘n roll!
- Jan 24, 2023 4:23:44 PM
- Posted by Brendan Barnard
- Topics: About the Robots, About the BOX
Can I print out the quizzes?
Absolutely, all the quizzes are loaded as PDF files and are ready for printing at your convenience.

- Jan 24, 2023 4:20:07 PM
- Posted by Brendan Barnard
- Topics: Teaching with the RobotsLAB BOX
What if I already have one of the robots?
It's always nice to find robotics fans! If you find yourself in the position of already owning some of the robots included in the BOX, you can control some of the robots you already own using our tablet and lessons,

we prefer you don't do that:
- Jan 24, 2023 4:18:02 PM
- Posted by Brendan Barnard
- Topics: About the Robots, Ordering, Processing, & Shipping, About the BOX
How easy is it to carry the box?
The RobotLAB-BOX fully loaded weighs 25lbs and can be carried by three easy to use handles, or you can extend the handle bar and roll the BOX like a piece of luggage. The heavy-duty plastic box is very durable and easy to transport, plus it’s black so it will match anything you’re wearing. Did we mention you look fantastic today?
- Jan 24, 2023 4:14:14 PM
- Posted by Brendan Barnard
- Topics: About the BOX
When I connect my tablet to a projector, the image coming from my projector is a weird color. What's going on?
If your tablet's screen looks normal, but the image coming from the projector is the wrong color, the issue is probably in either the projector dongle or the projector.
- Jan 24, 2023 3:50:46 PM
- Posted by Brendan Barnard
- Topics: Troubleshooting & Warranties, About the BOX
NAO or Pepper Robot Does Not Respond When I Talk To It

Both NAO and Pepper can be programmed to respond to a variety of stimuli, or programmed to engage in back and forth conversations. This is not a default behavior however, and your NAO or Pepper will not respond to any conversation until you teach it how to.
One easy way to do this is to install something called “Basic Channels” from the Aldebaran Cloud store. Basic Channels is a packaged set of dialog programs that makes the robot conversational right away.
If your NAO or Pepper used to respond to you and recently stopped, it is possible that the volume of the robot has been turned down so low that its answers are inaudible. It is also possible that a microphone is malfunctioning in the head. If you believe this to be the case, Contact Support.
- Jan 18, 2023 4:04:26 PM
- Posted by Bryan Holmes
- Topics: NAO, Pepper
Tour Creator Troubleshooting
 If you are having trouble resetting your Tour Creator password, Contact Support.
There are two problems you might experience when creating tours in Tour Creator:
I created a project in Tour Creator but it isn’t showing up on the tablet.
"My Tours" has an unpublished project even though I selected “Publish” in Tour Creator.
Both of these problems stem from the Tour Creator login email address and the Expeditions 2.0 Activation Code.
- Jan 18, 2023 3:55:28 PM
- Posted by Bryan Holmes
- Topics: Expeditions, Expeditions 2.0
Expeditions 2.0 is Not Displaying Correctly
This post has the solution for the following problems:
When I open Expeditions 2.0, I can’t see all of the headings on the left side.
Expeditions 2.0 is not displaying correctly.
Parts of Expeditions 2.0 are missing
If the menu on the left side of Expeditions 2.0 does not go all the way down to “Settings”, you may need to change your display settings.
- Jan 18, 2023 3:46:25 PM
- Posted by Bryan Holmes
- Topics: Expeditions, Expeditions 2.0
Pepper Does Not Start

If you push Pepper's chest button and nothing happens, don't panic. In almost every case an unresponsive Pepper is caused by one of two things: a depleted battery or the emergency stop button. Both can be checked easily.
- Jan 18, 2023 1:15:54 PM
- Posted by Bryan Holmes
- Topics: Pepper
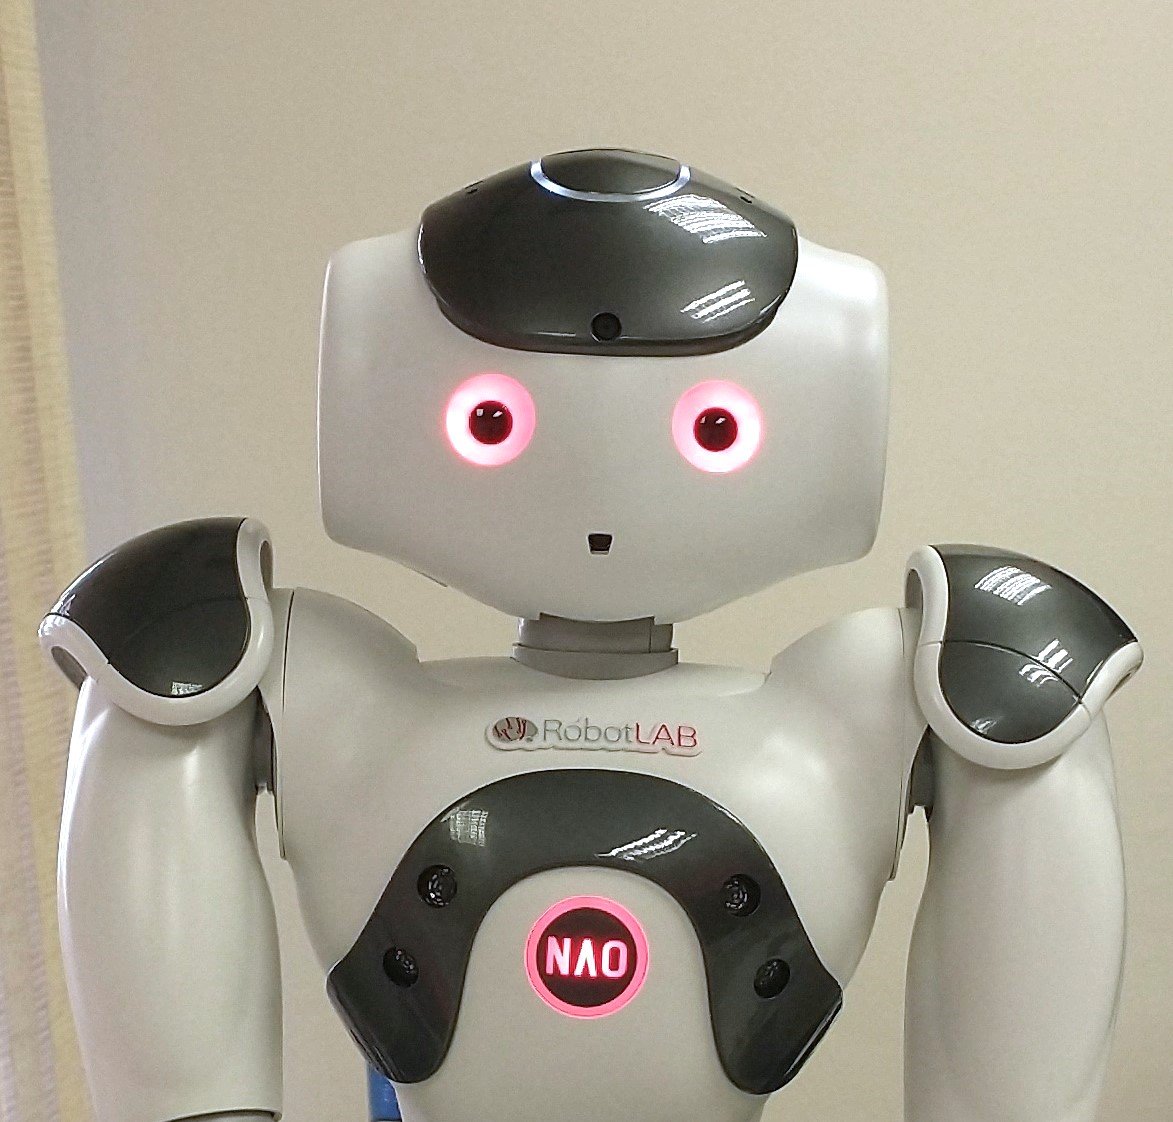
NAO or Pepper Robot giving "Error 713"

Error 713: I can’t move anymore. I detected an error on n of my vital devices: [list n devices].
- Jan 18, 2023 1:14:56 PM
- Posted by Bryan Holmes
- Topics: NAO, Pepper, Error
NAO Does Not Finish Booting
NAO does not finish booting up.

In rare cases, after a NAOqi update or factory reset, NAO will get “stuck” during its boot process and will never finish booting up. If you have been waiting (and waiting, and waiting) for NAO to finish booting up, there is probably a solution. This problem can usually be identified by the ear LEDs or the chest button LED.
- Jan 18, 2023 1:13:21 PM
- Posted by Bryan Holmes
- Topics: NAO
Is My NAO Battery Okay?
|
Does my NAO have a battery problem? As long as the battery is inside the NAO, it is delivering a small amount of electricity to the robot, even while shut down. If the NAO sits for a long time unused, the battery can become so depleted that it can no longer be charged. If you suspect this is the case for your battery, here are some of the telltale signs:
If you conclude that you need a new battery, head to https://www.robotlab.com/store/battery to purchase a new one. |
- Jan 18, 2023 1:11:41 PM
- Posted by Bryan Holmes
- Topics: NAO
NAO Robot Does Not Stand Up
There are two common reasons a NAO will not stand up. One of them can be fixed by the customer with a computer and the other requires shipping the NAO for service.
Rather than try to distinguish between the two cases, it is easier to simply attempt the intervention and test the result. Your NAO will need to be connected to a WIFI network or hardwired to your computer, and you will need to SSH into the NAO. We use the program PuTTY for this purpose, but you can also use a Command Prompt.
- Jan 18, 2023 1:10:36 PM
- Posted by Bryan Holmes
- Topics: NAO
Check or Change NAO Robot Volume
|
This post can help if you are experiencing a problem such as: -My NAO robot won't speak to me. -My NAO robot won't say anything. -My NAO robot stopped making sound. |
- Jan 17, 2023 3:24:43 PM
- Posted by Bryan Holmes
- Topics: NAO
Deactivate Fall Manager on NAO Robot
Sometimes it is necessary to deactivate the NAO robot's safety features. Follow these instructions if deactivating fall manager is necessary for your project.
Even with Fall Manager enabled, we recommend catching the NAO robot whenever possible.
- Jan 13, 2023 1:01:02 PM
- Posted by Maria Alejandra Calcetero
- Topics: NAO, Support, NAO robot, NAO Robot v6

Factory Reset NAO or Pepper Robot Using Choregraphe

1. On your computer, download the NAOqi System Image for your Robot.
2. Launch Choregraphe.
3. Plug the Battery Charger into the Robot.
- Nov 10, 2021 2:22:39 PM
- Posted by Maria Alejandra Calcetero
- Topics:
How to Install VR Expeditions 2.0 on a Lenovo Mirage Solo Student Device in 10 easy steps!
*You will need a license to follow the steps. Don't have a license yet? Click here to obtain one.
*These steps are only compatible with Lenovo Mirage Solo.
Step 1 - Turn goggles on
Turn your goggles on by pressing the power button on the (right) side of your headset. Your screen will look like this when your device is ready.
- Jul 21, 2021 5:53:31 PM
- Posted by Maria Alejandra Calcetero
- Topics:
How to Factory Reset a Pepper Robot
In some scenarios you will need to reinstall Pepper’s operating system, called NAOqi. Follow these steps to perform a factory reset on your Pepper. You can also factory reset Pepper using Choregraphe - those instructions are here.
- Apr 23, 2019 6:07:48 PM
- Posted by Maria Alejandra Calcetero
- Topics: Pepper
Add a Language to Your NAO or Pepper Robot
In order to install new languages on your NAO this is what you need to do:
- Mar 29, 2019 6:26:52 PM
- Posted by Natanel Dukan
- Topics: NAO, language
Choregraphe Error: msvcr100.dll Was Not Found
Did you recently install Choregraphe 2.8.5 or higher for your V6 and received this error? Choregraphe-bin.exe – System error The code execution cannot proceed because MSVCR100.dll was not found. Reinstalling the program may fix this problem.
There are actually two files you might need to add manually to your system folder in order to get Choregraphe operational again.
- Feb 26, 2019 12:12:35 PM
- Posted by Paul Knaack
- Topics: NAO, Error
Adding students to your EngageK12 classroom
The EngageK12 platform is more than lessons and courses to help you use robots in the classroom. It is also a classroom management software. In fact, the way to use the lessons in your class is by creating an EngageK12 classroom and add students to it.

- Feb 15, 2019 4:52:38 PM
- Posted by Natanel Dukan
- Topics: 21st Century Classroom, students, EngageK12
Autonomous car - What happened to my program it isn't english? (내 프로그램은 어떻게 된거야?)
The first time you open Orchestra, it may load in the wrong language.

Don’t worry! You can easily change the language by clicking the globe icon in the top right corner.
- Aug 20, 2018 6:01:03 PM
- Posted by Samantha Baker
- Topics: Autonomous Cars
Autonomous Car Infrared Reset Instruction
Have you found that your car’s autonomous drive mode has started working strangely? Does the car move erratically, seeming to respond to invisible obstacles, or exclusively move backward?
We have a simple solution for you!
Reset the IR Sensors
- Aug 20, 2018 5:53:01 PM
- Posted by Samantha Baker
- Topics: Autonomous Cars
How to Home my Dobot?
If you have used a Dobot robotic arm, it is likely that you have “homed” your
- Aug 2, 2018 1:44:12 PM
- Posted by Samantha Baker
- Topics: Robotic Arm
How do I delete a lesson from my classes on EngageK12!
The short answer is that to delete a lesson from a class you need to send us an email for our team to delete it for you. Please email support@RobotLAB.com with the name of the class and which lesson in that class you want to delete. We will delete the lesson or the class within 24hours when the request is made during working days.
- Jul 25, 2018 1:30:12 PM
- Posted by Natanel Dukan
- Topics: Curriculum, EngageK12
- Jul 24, 2018 4:50:09 PM
- Posted by Samantha Baker
- Topics: Robotic Arm
General Tips for Cubelets
As we work with our new products, it’s not uncommon for us to find possible issues that we don’t see documented elsewhere on the internet. When that happens, we work hard to find a solution or workaround, and post it to this blog!

- Jul 20, 2018 12:23:09 PM
- Posted by Elisa Heinrich Mora
- Topics: Troubleshooting & Warranties, Cubelets
How to Safely Move Pepper Robot
Before moving Pepper around, make sure that:
1. The floor is flat, dry and there is no rug or a thick carper on the way that could cause the robot to fall.
2. There is at least 120 cm of free space around the robot.
3. You keep Pepper away from steps.
- Jul 19, 2018 5:56:32 PM
- Posted by Anna Sandler
- Topics: Troubleshooting & Warranties, Pepper
Ozobot Color Coding Doesn't Work Properly
Here are some things to try if your Ozobot robot ignores the color coded instructions:
1. Make sure your lines are the right size.
In order to make the Ozobot recognize the line,
it should be about 5 mm wide.
2. Make sure your lines are consistent.
If the line gets wider or thinner,
Ozobot may loose the line and stop its motion.
3. Make sure your turns are curved gracefully.
If the continuation of the line is in parallel and too close,
the Ozobot robot may see it as the same line
and won't be able to make the turn.
4. Make sure you don't have sharp curves.
5. Make sure your color coded sequence is positioned correctly.
The sequence should be surrounded by
Black lines longer than 2 cm in length.
All colored components of the sequence should be
the same size and length,
without any white space in between or overlapping colors.
6. Make sure the coded sequence colors you are using are not too dark or light.
7. Make sure the sequence is at least 5mm wide
and no longer than 6 mm in length for a single color.
8. Make sure your color coded sequence is well seen by the robot.
Keep codes on straight lines away from the corners,
away from intersections,
and at least 2.5 cm apart from each other.
9. Make sure you are using the correct markers
10. Make sure your robot is fully charged.
If Ozobot blinks red, then the battery needs to be charged.
11. Make sure your Ozobot robot is calibrated.
12. Make sure your Ozobot robot is clean to allow his sensors a good visibility.
- Jul 19, 2018 4:09:38 PM
- Posted by Anna Sandler
- Topics: Troubleshooting & Warranties, Ozobot

- Jul 19, 2018 3:34:36 PM
- Posted by Anna Sandler
- Topics: Troubleshooting & Warranties, Ozobot
How to Clean Ozobot
Dust or grease can get into Ozobot Bit’s drive train and affect its movement.
- Jul 19, 2018 3:30:46 PM
- Posted by Anna Sandler
- Topics: Troubleshooting & Warranties, Ozobot
- Jul 19, 2018 3:22:21 PM
- Posted by Anna Sandler
- Topics: Troubleshooting & Warranties, Ozobot
How to Calibrate Ozobot
It is extremely important to calibrate the Ozobot robot every time you begin playing, when light conditions change and whenever you change your playing surface.
Ozobot’s infrared sensors (also known as its "eyes") are highly sensitive to surrounding light.
As a result, changing paper or moving closer to a window affects Ozobot’s ability to follow lines and read color codes.
Calibration orients Ozobot to the surrounding light and surface.
There are two methods to calibrate the Ozobot robot.
- Jul 19, 2018 3:02:38 PM
- Posted by Anna Sandler
- Topics: Troubleshooting & Warranties, Ozobot
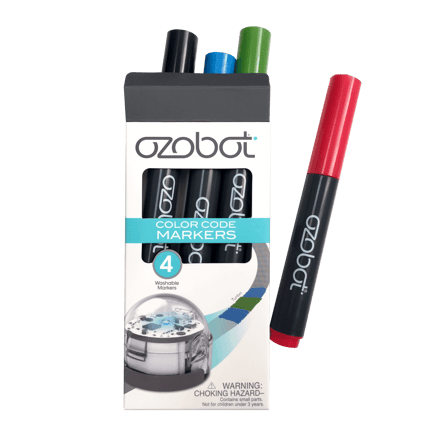
How to Create Your Own Ozobot Playground
In order to create your own playground for Ozobot, you will need:
* A white sheet of paper;
* Thick markers: Black, Blue, Red and Green.
- Jul 19, 2018 2:21:39 PM
- Posted by Anna Sandler
- Topics: Troubleshooting & Warranties, Ozobot
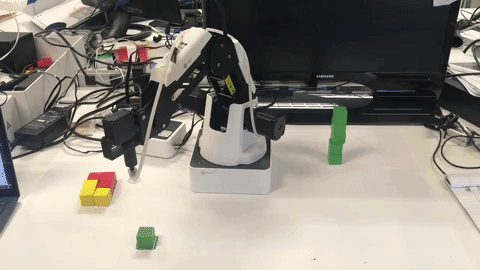
Dobot Discovery: removing attachments safely
One of the advantages of Dobot over other robotic arms is the diverse array of attachments that come included in the system. This robot can manipulate objects with a gripper or suction cup, draw beautiful designs with robotic precision, 3D print, and even laser engrave! Best of all, switching between the functionalities is as simple as replacing the end attachment.
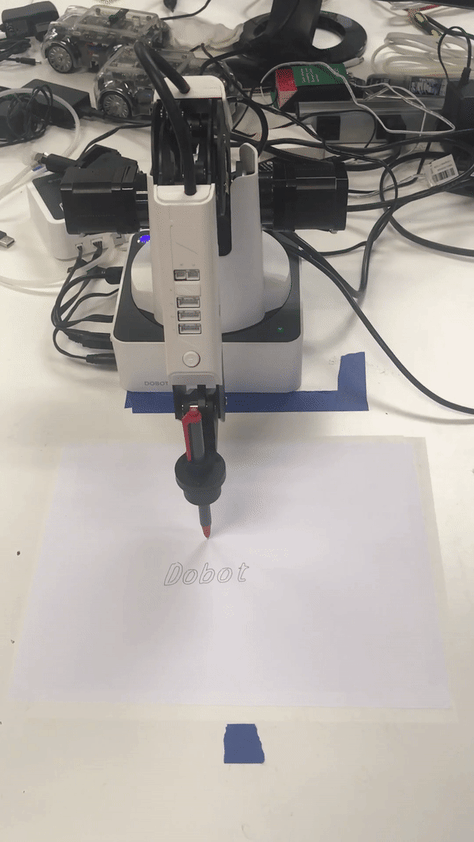
But don’t forget! The Dobot Magician has an internal computer, and just like your laptop, it doesn’t respond well when you suddenly unplug devices.
- Jul 18, 2018 6:07:26 PM
- Posted by Samantha Baker
- Topics:
What Doesn't Works When Using LittleBits in the Classroom?
• LittleBits can fall off of desks and tables, and often end up getting stepped on.
Using cafeteria trays when students are working with the Little-Bits can help with this problem.
- Jul 18, 2018 5:45:27 PM
- Posted by Anna Sandler
- Topics: Troubleshooting & Warranties, LittleBits
What Works Well When Using LittleBits in the Classroom?
• Allow students to bring in their own materials, such as LEGO or K’Nex, for their projects.
- Jul 18, 2018 5:40:10 PM
- Posted by Anna Sandler
- Topics: Troubleshooting & Warranties, LittleBits
My LittleBits Don't Stick to Structure Surfaces
Potential Solutions to Try:
- Jul 18, 2018 5:36:21 PM
- Posted by Anna Sandler
- Topics: Troubleshooting & Warranties, LittleBits
My LittleBits LED Won't Light Up
Potential Solutions to Try:
- Jul 18, 2018 5:30:46 PM
- Posted by Anna Sandler
- Topics: Troubleshooting & Warranties, LittleBits
My LittleBits Connectors Have Adhesive Residue On Them
Potential Solutions to Try:
- Jul 18, 2018 5:28:12 PM
- Posted by Anna Sandler
- Topics: Troubleshooting & Warranties, LittleBits
My LittleBits Motors Are Not Working Properly
If your Little-Bits motors are running slowly, or one of the motors lags behind, here are some things you should try:
- Jul 18, 2018 5:24:46 PM
- Posted by Anna Sandler
- Topics: Troubleshooting & Warranties, LittleBits
My LittleBits Circuit Isn't Working
Potential Solutions to Try:
- Jul 18, 2018 5:19:50 PM
- Posted by Anna Sandler
- Topics: Troubleshooting & Warranties, LittleBits
How To Take Care of LittleBits in the Classroom
Keeping Your Bits Organized
- Jul 18, 2018 5:07:25 PM
- Posted by Anna Sandler
- Topics: Troubleshooting & Warranties, LittleBits
Dobot - The suction cup bug scenarios
As we work with our new products, it’s not uncommon for us to find small bugs and issues that we don’t see documented elsewhere on the internet. When that happens, we work hard to find a solution or workaround, and post it to this blog!
The Dobot uses a suction cup attached to an air pump to create a vacuum seal on objects you want to grab, and releases that seal when it’s time to drop the object.
- Jul 18, 2018 5:02:43 PM
- Posted by Samantha Baker
- Topics: Robotic Arm
Dobot suction cup is blowing air out!
This is the strangest and most elusive problem we have encountered. I suspect it occurs when the Dobot attachment has recently been switched from the gripper to the suction cup. The gripper uses the air pump to both open and close, using both positive and negative air pressure. The suction cup only uses negative air pressure (or none at all).
- Jul 18, 2018 5:01:53 PM
- Posted by Samantha Baker
- Topics: Robotic Arm
Dobot suction cup doesn't seem to be doing anything at all
You may have received a suction cup with a missing/undersized/partly blocked inner hole. Don’t worry, this is an easy fix.
- Jul 18, 2018 4:55:32 PM
- Posted by Samantha Baker
- Topics: Robotic Arm
How To Fix Malfunctioning LittleBits
Please try the following before you contact our support if one of your LittleBits doesn't work:
- Jul 18, 2018 4:52:59 PM
- Posted by Anna Sandler
- Topics: Troubleshooting & Warranties, LittleBits
Dobot suction cup isn't sucking hard enough to create vacuum
When using the suction cup od Dobot, you may hear the air pump humming, but the suction cup isn't sucking hard enough to create a vacuum.
- Jul 18, 2018 4:45:27 PM
- Posted by Samantha Baker
- Topics: Robotic Arm
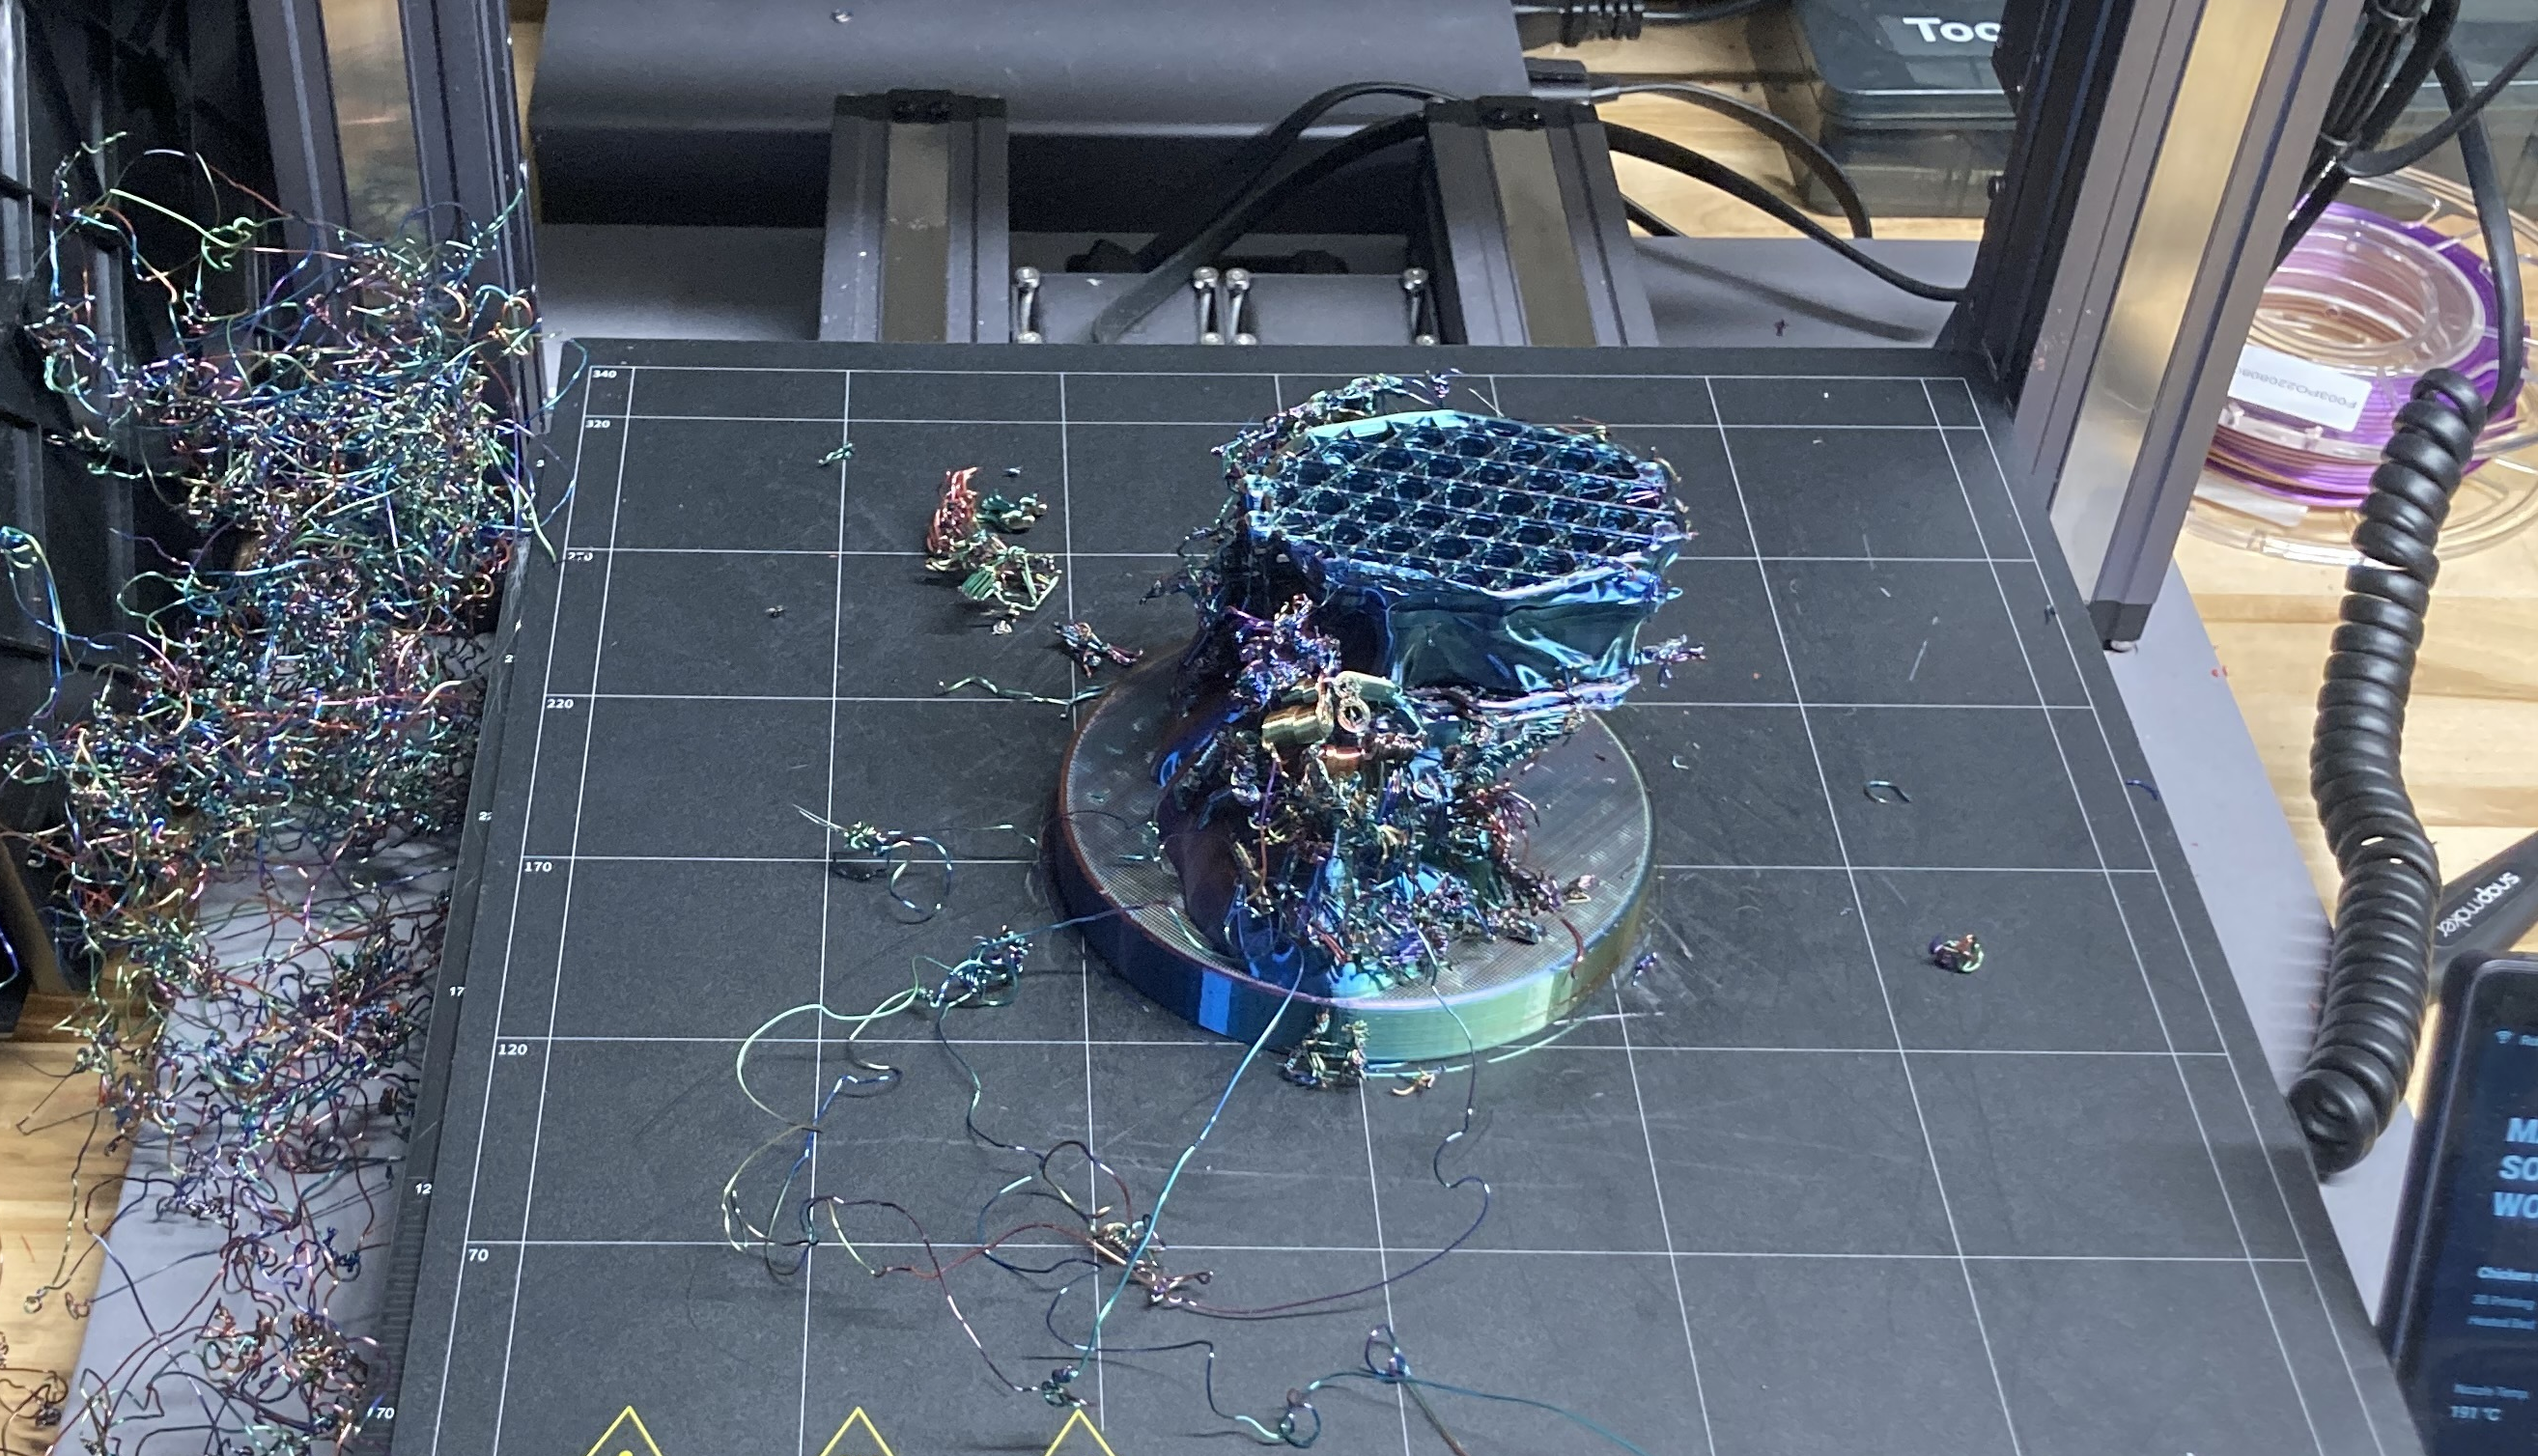
3D Printer Filament Is Stuck
Filament can swell inside the extruder and get stuck.
If you cannot unload filament from one of the extruders, do the following:
1. On the LCD panel, navigate to Utilities > Change Filament > Unload. This option heats the extruders.
- Jul 18, 2018 4:13:58 PM
- Posted by Anna Sandler
- Topics: MakerBot, 3D-Printer
How to 3D Print With The Most Quality Guide
Cracks, Warping, Rippling, Drift... Tips to help your projects look their best on the very first try.
- Jul 18, 2018 2:42:50 PM
- Posted by Anna Sandler
- Topics: Troubleshooting & Warranties, MakerBot, 3D-Printer
3D Printer Safety Instructions
Dos and don'ts
- Jul 18, 2018 2:25:10 PM
- Posted by Anna Sandler
- Topics: Troubleshooting & Warranties, MakerBot, 3D-Printer
3D Printer Filament Not Loading
If you are having problems loading filament into one of the extruders, perform the following steps:
1. Using the LCD panel, navigate to Utilities > Filament Options > Unload. This option heats the extruders.
2. Make a fresh cut at the end of the filament. It is important that the filament have no bends in it. If there are bends, cut off the bent section of filament.
3. Insert the filament into the hole at the top of the extruder. Keep pushing it in until you start to see plastic come out of the nozzle.
You might have to apply some pressure.
4. When the filament is successfully loaded, set the extruder lever arm to the closed position.
- Jul 18, 2018 2:04:43 PM
- Posted by Anna Sandler
- Topics: Troubleshooting & Warranties, MakerBot, 3D-Printer
3D Printer Replicator Shakes
Your MakerBot Replicator will shake during printing if you print at high speeds with acceleration turned off.
Attempting to print at high speeds with acceleration turned off can harm your MakerBot Replicator.
To check and change the Acceleration setting, go to the LCD menu on your Replicator MakerBot 2X and navigate to Info and Settings > General Settings > Accelerate.
You can turn acceleration off and on. Acceleration is turned on by default. If you have acceleration turned off, you should not print at speeds above 40 mm/s.
- Jul 18, 2018 2:01:41 PM
- Posted by Anna Sandler
- Topics: Troubleshooting & Warranties, MakerBot, 3D-Printer
3D Printer Extrusion Stops
There are a few problems that can cause your MakerBot Replicator to stop extruding. Use this checklist to determine the cause and appropriate solution.
- Jul 18, 2018 1:59:17 PM
- Posted by Anna Sandler
- Topics: Troubleshooting & Warranties, MakerBot, 3D-Printer
3D Printed Objects Are Difficult to Remove from the Build Plate
If printed objects are difficult to remove from the build plate, try these solutions:
• Wait for the build plate to cool down. Objects will detach more easily when both the plastic and the plate are cool.
- Jul 18, 2018 1:53:14 PM
- Posted by Anna Sandler
- Topics: Troubleshooting & Warranties, MakerBot, 3D-Printer
3D Printed Objects Do Not Stick to the Build Plate
If printed objects are not sticking to the build plate, try these solutions:
- Jul 18, 2018 1:42:21 PM
- Posted by Anna Sandler
- Topics: Troubleshooting & Warranties, MakerBot, 3D-Printer
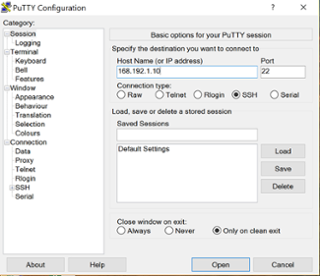
NAO can’t connect to the “Former Web Page”
1. Make sure your robot is properly connected to your network (or directly to your computer).
If you're not sure, press NAO's chest button once. The robot should say its IP address (write it down, you'll need it).
2. Download and install the software PuTTY on your computer. You can find it here.
3. Open PuTTY and type your NAO's IP address in the "HOST NAME" field. Confirm by clicking on "OPEN".
- Jun 15, 2018 5:50:37 PM
- Posted by Paul Knaack
- Topics: NAO
Don't forget to charge your NAO Robot!
So you just received your new NAO robot... the first thing you want to do is charge it for at least 90 minutes. Another tip to keep the battery fresh, you should charge it at least once every 90 days (especially if you are not going to be using it for a period of time). As an example, summertime, when you go on break, charge it before you go and charge it once again when you return, this will keep the lithium ion battery from depleting.
Now, enjoy your NAO robot and have a great day
Are you interested in having a NAO Robot? Ask for a Price Quote Request!

- Mar 15, 2018 6:48:11 PM
- Posted by Paul Knaack
- Topics: NAO, Charger
Factory Reset NAO Robot with a USB Flasher
Disclaimer: The following support solution will erase the memory on NAO. Make sure you are familiar with disk formatting and know/follow the directions before attempting the following. If you have questions, contact us before attempting this solution.
(You can follow this video as well)
- Feb 12, 2018 4:51:13 PM
- Posted by Paul Knaack
- Topics: NAO
DoBot Suction cap doesn't hold anything
If you experience a low suction / low pick up rate, you would like to look inside the suction cup and make sure there's no obstruction to the air flow. Sometimes the rubber isn't cut all the way through, you would like to peel it off / remove it, to allow the pump to create the vaccum.
- Feb 1, 2018 7:08:29 PM
- Posted by Paul Knaack
- Topics: Robotic Arm
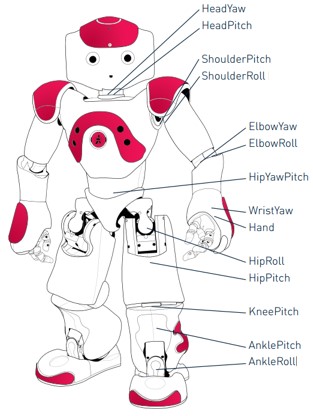
NAO Anatomy: Sensing and Movement on Your Robot
The NAO robot has 25 joints and 25 degrees of freedom, or directions in which motion can occur on its body. (For comparison, the human body has 230 joints and 244 degrees of freedom, wow!)
- Nov 22, 2017 3:17:19 PM
- Posted by Samantha Baker
- Topics:
NAO robot can't understand voice command
You just received your NAO and you're very excited to discover all it can do and how to use it. You are following all the steps to get started. The NAO has just registered to the basic channel and it's now ready to engage and interact with you. He's looking at you and you ask " Hello NAO, what can you do ?" The robot looks at you and ignores you . You try again " hey NAO, what can you do ?" ... nothing. As if you were not here. You try another sentence "What's your name?" .. silence, nothing. How frustrated this can be, it's new and already broken. What's wrong with its microphones?
- Jul 26, 2017 5:21:32 PM
- Posted by Natanel Dukan
- Topics: NAO
“Warning: the motors are not updated, the robot will not move” What should I do?
I have a warning about motors not updated. It says: “Warning: the motors are not updated, the robot will not move”.

- Jul 14, 2017 4:03:44 PM
- Posted by Natanel Dukan
- Topics:
NAO Robot Error 501
If you are getting a “Error 501. I can’t connect to Cloud services; my system date is wrong.” this is most likely an indication the the head battery is depleted or dead.
- Jul 12, 2017 6:56:42 PM
- Posted by Cedric Vaudel
- Topics: NAO, Error
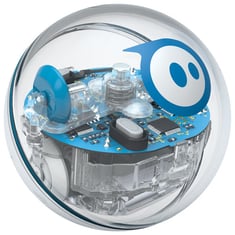
The Sphero lesson display is acting strange – the grid keeps disappearing or re-aligning. What’s going on?
This is an old software bug we've fixed in Version 2! Looks like your tablet needs an update!
- Jan 7, 2014 2:32:00 PM
- Posted by Brendan Barnard
- Topics: Troubleshooting & Warranties, Sphero
My Sphero won't connect to my tablet
Having trouble connecting to your Sphero? There are a few things to try, from checking the charge, to re-pairing, but we also have a software update for Sphero available that might fix things. Update to Version 2 now, if you haven't already!
#1 Give Sphero a good shake; if it doesn’t light up, or if it only shows a red light, the robot needs to be charged (see Charging my Sphero). If you see a pattern of three colors (remember them for step two) then your Sphero is charged; once you’ve determined that you have a fully charged robot and if you’re still having connection problems move on to step two!
#2 Grab your tablet and turn it on; from the tablet’s homescreen tap on the screen and drag/swipe to the left with your finger to reveal a second panel of apps. Click on the one labeled "Settings."

- Oct 25, 2013 3:44:00 PM
- Posted by Brendan Barnard
- Topics: Troubleshooting & Warranties, Sphero
RobotLAB BOX keeps evolving - release notes
We work closely with our amazing teachers and awesome customers to continuously develop more lessons, add features, and improve existing lessons.
We would like to thank our community for all the feedback and the great ideas that we continue to incorporate into the RobotLAB BOX -- please, keep the suggestions coming!
A new version of the software is released and ready for download every semester -- please make sure your version is up to date. The update process is very easy, just follow the instructions here.
The following is a partial log of the latest changes:
- Oct 12, 2013 8:16:00 PM
- Posted by Anna Sandler
- Topics: Add ons, About the Tablet, About the BOX

- Oct 7, 2013 4:39:00 PM
- Posted by Brendan Barnard
- Topics: Troubleshooting & Warranties, About the BOX
I don’t know too much about how robots work, will this be a problem?
Actually, the RobotsLAB-BOX is made with you in mind. We’ve laid out easy to follow, step-by-step visual instructions and instructional videos to make sure you are completely comfortable operating any of the demonstration. You’ll look like a pro, even if it’s your first time working with robots and a tablet.

Feel free to contact us or email us if you still need support.
- Oct 7, 2013 4:11:00 PM
- Posted by Brendan Barnard
- Topics: About the Robots, About the Tablet, Teaching with the RobotsLAB BOX, About the BOX
How do I charge the Mobot?
First of all, we have three different "species" of Mobot. Look at the pictures below and pick yours out, then follow the instructions!.Charging your Mobot is really easy, but it does take around an hour so leave yourself some time before a planned lesson to check your robot and recharge it if necessary. We also suggest you charge Mobot for a little while after your lesson, so it goes back into the BOX ready for the next teacher!
- Oct 7, 2013 3:41:00 PM
- Posted by Brendan Barnard
- Topics: About the Robots, Troubleshooting & Warranties, About the BOX
How can I charge my Sphero?
Charging your Sphero is really easy, but it does take a few hours to charge from a completely dead battery, so leave yourself some time before a planned lesson to check your robot and recharge it if necessary.
- Oct 7, 2013 3:37:19 PM
- Posted by Brendan Barnard
- Topics: About the Robots, Troubleshooting & Warranties, Sphero

- Oct 7, 2013 1:55:27 PM
- Posted by Brendan Barnard
- Topics: Ordering, Processing, & Shipping, About the BOX
Do you provide professional development for teachers?
Yes we do, please contact us, and we will be happy to provide more details on training, professional development and workshops we offer to our customers.

- Oct 7, 2013 1:52:29 PM
- Posted by Brendan Barnard
- Topics: Add ons, Teaching with the RobotsLAB BOX
Do the lessons align with any teaching standards?
Yes! We align with the Common Core, NGSS, TEKS and STAAR standards.
 |
- Oct 7, 2013 1:50:52 PM
- Posted by Brendan Barnard
- Topics: Teaching with the RobotsLAB BOX, Standards
 Email Support
 Email Support
If you’re unable to find an answer on our website, fill out the form below to start a ticket. We normally aim to respond to all emails within a few days.
 Call-in support
 Call-in support
Our support engineers are standing by to help.
+1 (415) 702-3033© 2026 ROBOTLAB Inc. ALL RIGHTS RESERVED
*If you have questions related to how we use your data, please refer to our privacy policy link